There are always 100 ways to do the same thing in 3D software, a gift and a curse. To ease this overwhelming river of choices, this series will put similar commands against each other, and decipher their similarities and differences to make your modeling methods more specific and efficient.

DynaMesh VS ZRemesher

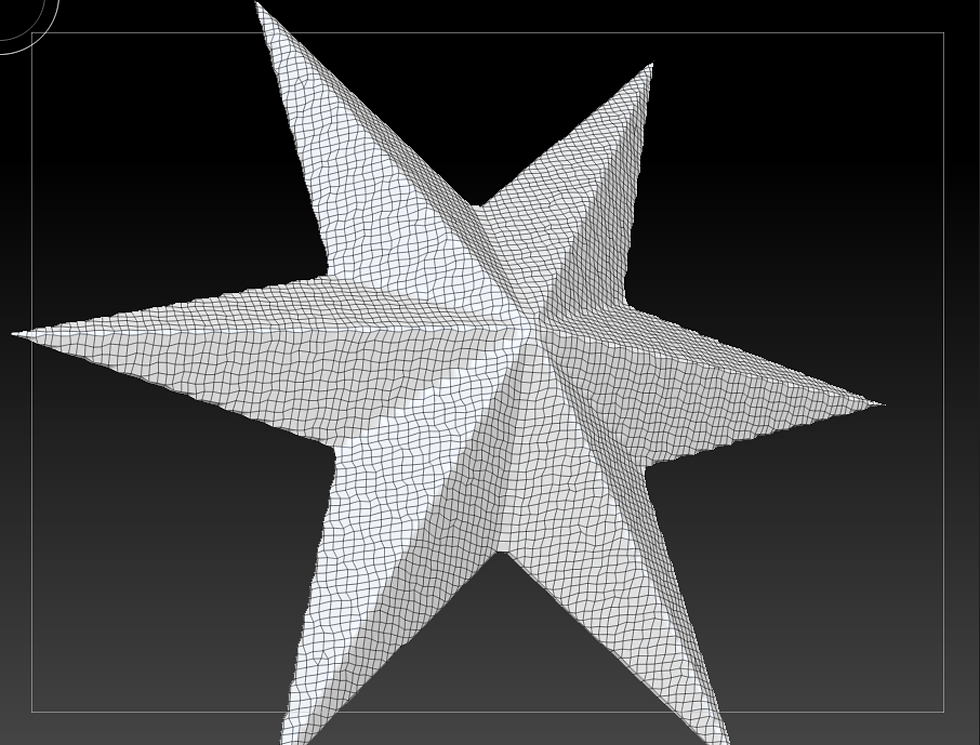
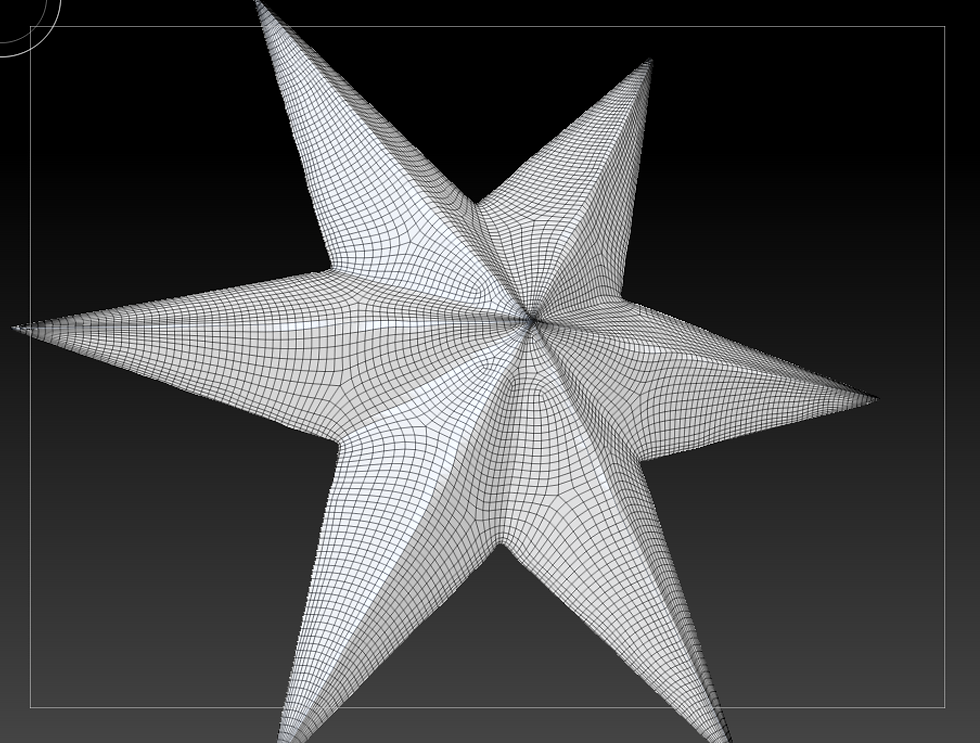
An example of a "crunchy" areas becoming less crunchy through the use of Dynamesh
Both DynaMesh and ZRemesher retopologize the geometry that makes up a model, evenly distributing it across the allotted space, and changing its diversely shaped polygons to add further balance and soundness to the mesh. This act is best used to resolve “crunchy” areas on a model (see image), and/or to aid in making the mesh more 3D printable by resolving thinner sections and closing holes.

Dynamesh
DynaMesh works by wrapping an imaginary cube around the model, projecting square-shaped polygons onto it (based on how the cube wraps), and creates a new mesh on the surface. During this projection, the algorithm will also close any holes in your mesh (holes that would make your file unprintable), fuse disconnected pieces together, and iron out any rough areas of geometry to create a streamline, solid mesh.
While a fabulous tool to use during the modeling process to maintain printability and check mesh soundness, DynaMesh has its cons. The user has little control over the algorithm’s result and the specifications that can be toggled are arbitrary and many a time convoluted (since scale/number are arbitrary in zBrush). For instance, the Resolution slider, which corresponds to the grid size of the projected cube, adjusts said resolution on a scale from 8 to 4096 unidentified units (is it inches? Centimeters? It does not say), so the result is a touch and go until you like what get experience. Becuase of this, it's also extremely easy to add too much unnecessary geometry to your file, which could cause performance problems for ZBrush. So when you're using DynaMesh, know that the higher resolutions on the slider do not necessarily equate to a better 3D file. Many printers cannot handle files larger than 1 million polygons.

ZRemesher
ZRemesher on the other hand does not use projected primitives like DynaMesh. Instead, it spends more time evaluating a model’s curvature to create evenly spaced quads across the surface; no triangles here, unlike DynaMesh, which in many cases can create triangles due to how the cube wraps around the model. The user also has a bit more control through its (more effective) toggle options that better maintain the model’s integrity. The user has the ability to add, subtract, or work with the model’s current geometry, and adjust the percentage by which to manipulate the model or surface’s shape. Working all together, numerous permutations can be created.
The best example of ZRemesher in action is how it is used in conjunction with MicroMeshing in ZBrush. By ZRemeshing a model’s planes, slowly reducing the polygon count, the user has more control over the thickness and size of the mesh that will be created off the plane.
However, where there are pros there are cons; since it is so much more specific, ZRemesher uses significantly more processing time than DynaMesh, and while both tend to smooth away micromanaged details on models, Dynamesh maintains them a bit more than ZRemesher.
In a nutshell: DynaMesh is great for general retopologizing as you work, while ZRemesher is great for preparing planes that will be panel looped or MicroMeshed.
Close Holes (Modify Topology) VS Close Holes (ZModeler)
The titles of both these commands speak for themselves; they allow the user to seal any open holes that are not truly three dimensional (remember, you can print a cube, not a square).

The Close Holes command in the Modify Topology menu will not only close but fill the hole simultaneously. For example, when an open topped cylinder is closed in this way, the entirety of the inside space is closed along with the top. This command’s algorithm will also close all holes that it recognizes on the model at the same time, and will use the surrounding geometry to create the best flowing cap and fill. This a good tool to use when checking for printability, and to identify any open areas that will not be read by print software.

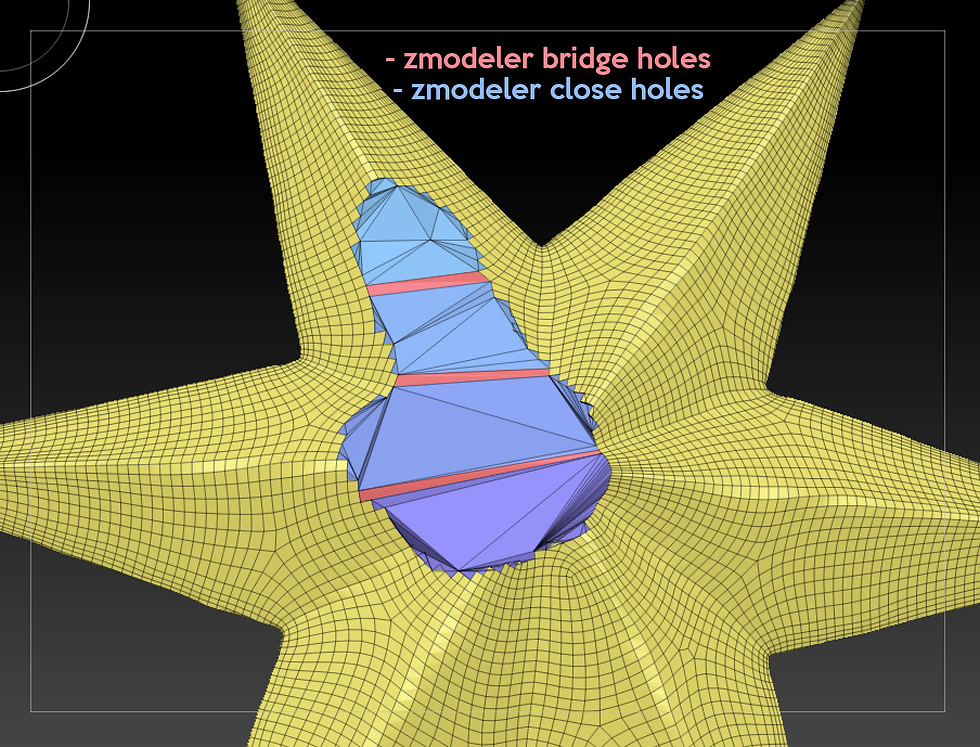
The Bridge, Close Hole combination in action
ZModeler’s Close Holes differs from the one in the Modify Topology menu in that it gives the user more control; you can close one hole at a time, as well as the type of cap (concave or convex) over it. Combined with the Bridge tool, the user can get even more specific results on the shape of the closure. Unlike its “counterpart,” this command will also not create a fill in the model, but only close the hole on the surface, making repairing model with thinner walls less tedious.
Downsides to having this much control though can cause micromanaging that could result in wonky geometry if the user is not being mindful of just how the holes are closing. This method can also be incredibly tedious and time consuming, depending on the complexity of the geometry or model.
In a nutshell: Use Modify Topology's Close Holes for printability checks and quick (and potentially dirty) fixes or modifications, and ZModeler’s Close Holes for cases where more control is necessary on fewer holes.
Standard Brush VS FormSoft Brush and Move Brush vs Move Elastic Brush
Both of these sets of brushes share the same similar but different nature.
Standard and FormSoft create raised or indented dome-like markings, while Move and Move Elastic stretch and dynamically push and pull surfaces. Both are vital tools for creating wonderfully organic sculpts ZBrush is known for.

Form Soft v.s. Standard Brush
The differences between both sets of brushes lie deep in their brush settings. The Standard brush has a significantly higher default intensity (25) compared to FormSoft (3), and uses a different default stroke style (Standard uses Dots while FormSoft uses Freehand). Their depths also vary greatly, with Standard’s being at 0 and FormSoft at 34; this affects where on the surface the pulling or manipulating starts from; it could be slightly above the model or directly on top of the model's surface.
All of these settings result in nuanced but different results: the higher intensity and neutral depth makes Standard a more intense mark maker with a more distinctive oval shape (due to its stroke) compared to FormSoft, whose shallow depth and light intensity create a far more gentle, rolling hill look that is less bound to a distinctive shape.

Move Elastic v.s. Move Brush
The biggest difference between Move and Move Elastic is their Elasticity Strength settings (Move at 0 Move Elastic at 80). This defining feature affects the ease and control of the pulling movement, which in the case of Move, is significantly less than Move Elastic.
At the end of the day, since each pair is essentially the same brush, the user can adjust these settings to swap their differences, making FromSoft the Standard brush and vice versa; so why would ZBrush not consolidate, and just have one brush? This could be because of ZBrush’s foundation being based in 2D painting. Having similar but different tools to create specific details and marks is essential in any artist’s kit.
In a nutshell: For more extreme shapes and marks, us Standard and Move Elastic. For a more subtle effect, use FormSoft and Move.
The battles are not over yet!
Stay tuned for Part II, where we pit more awesome commands again each other! As always, let us know what you would like to see, in ZBrush and in other programs!
